本篇介紹如何透過Gitlab 部署一個WebServer 在Cloudrun上。
Prerequisites
- Google Cloud Platform帳號
- Google Cloud Platform專案
- Gitlab帳號
- Apllication and Dockerfile
步驟
-
登入gitlab
-
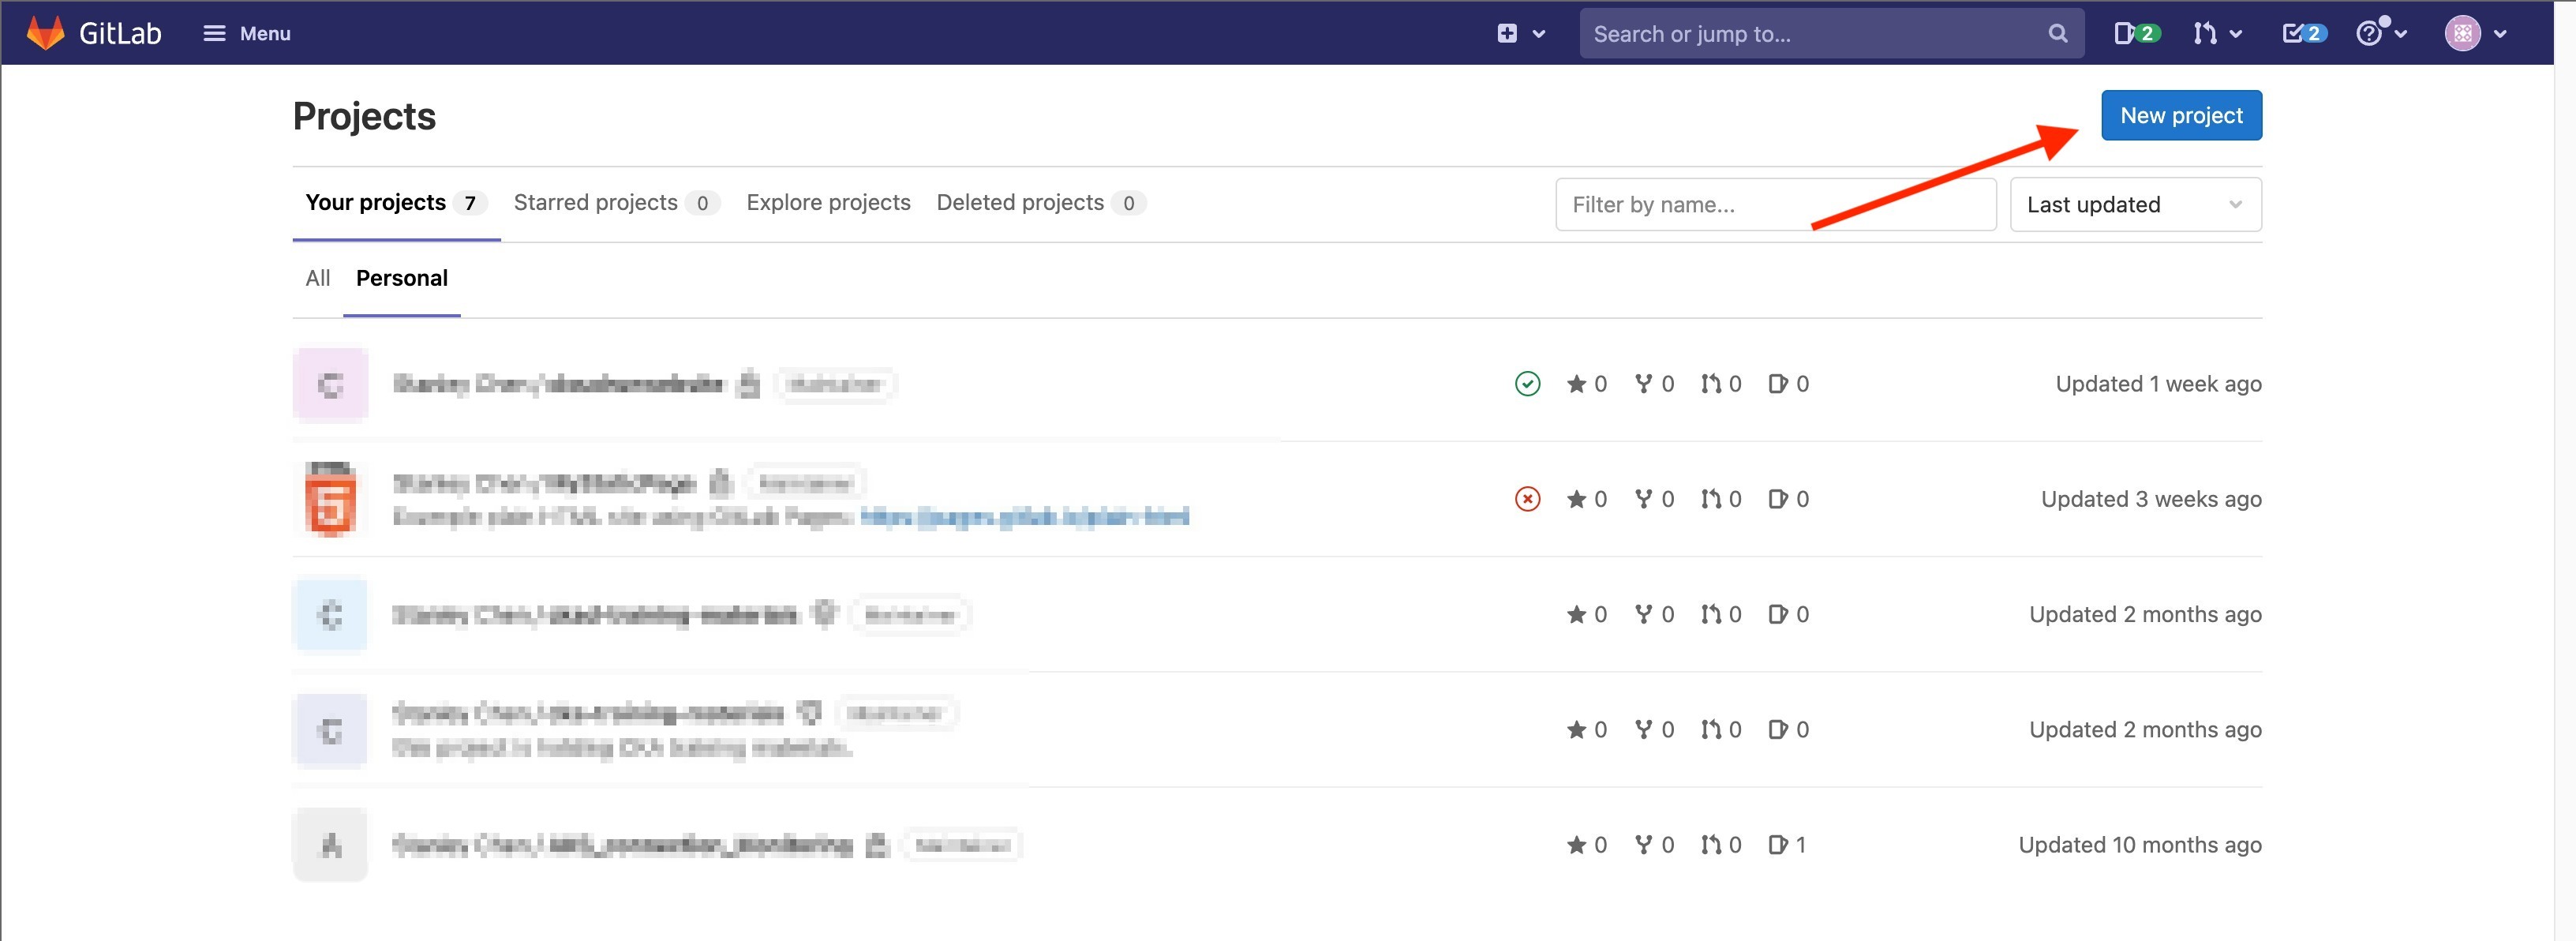
點選New Project
-
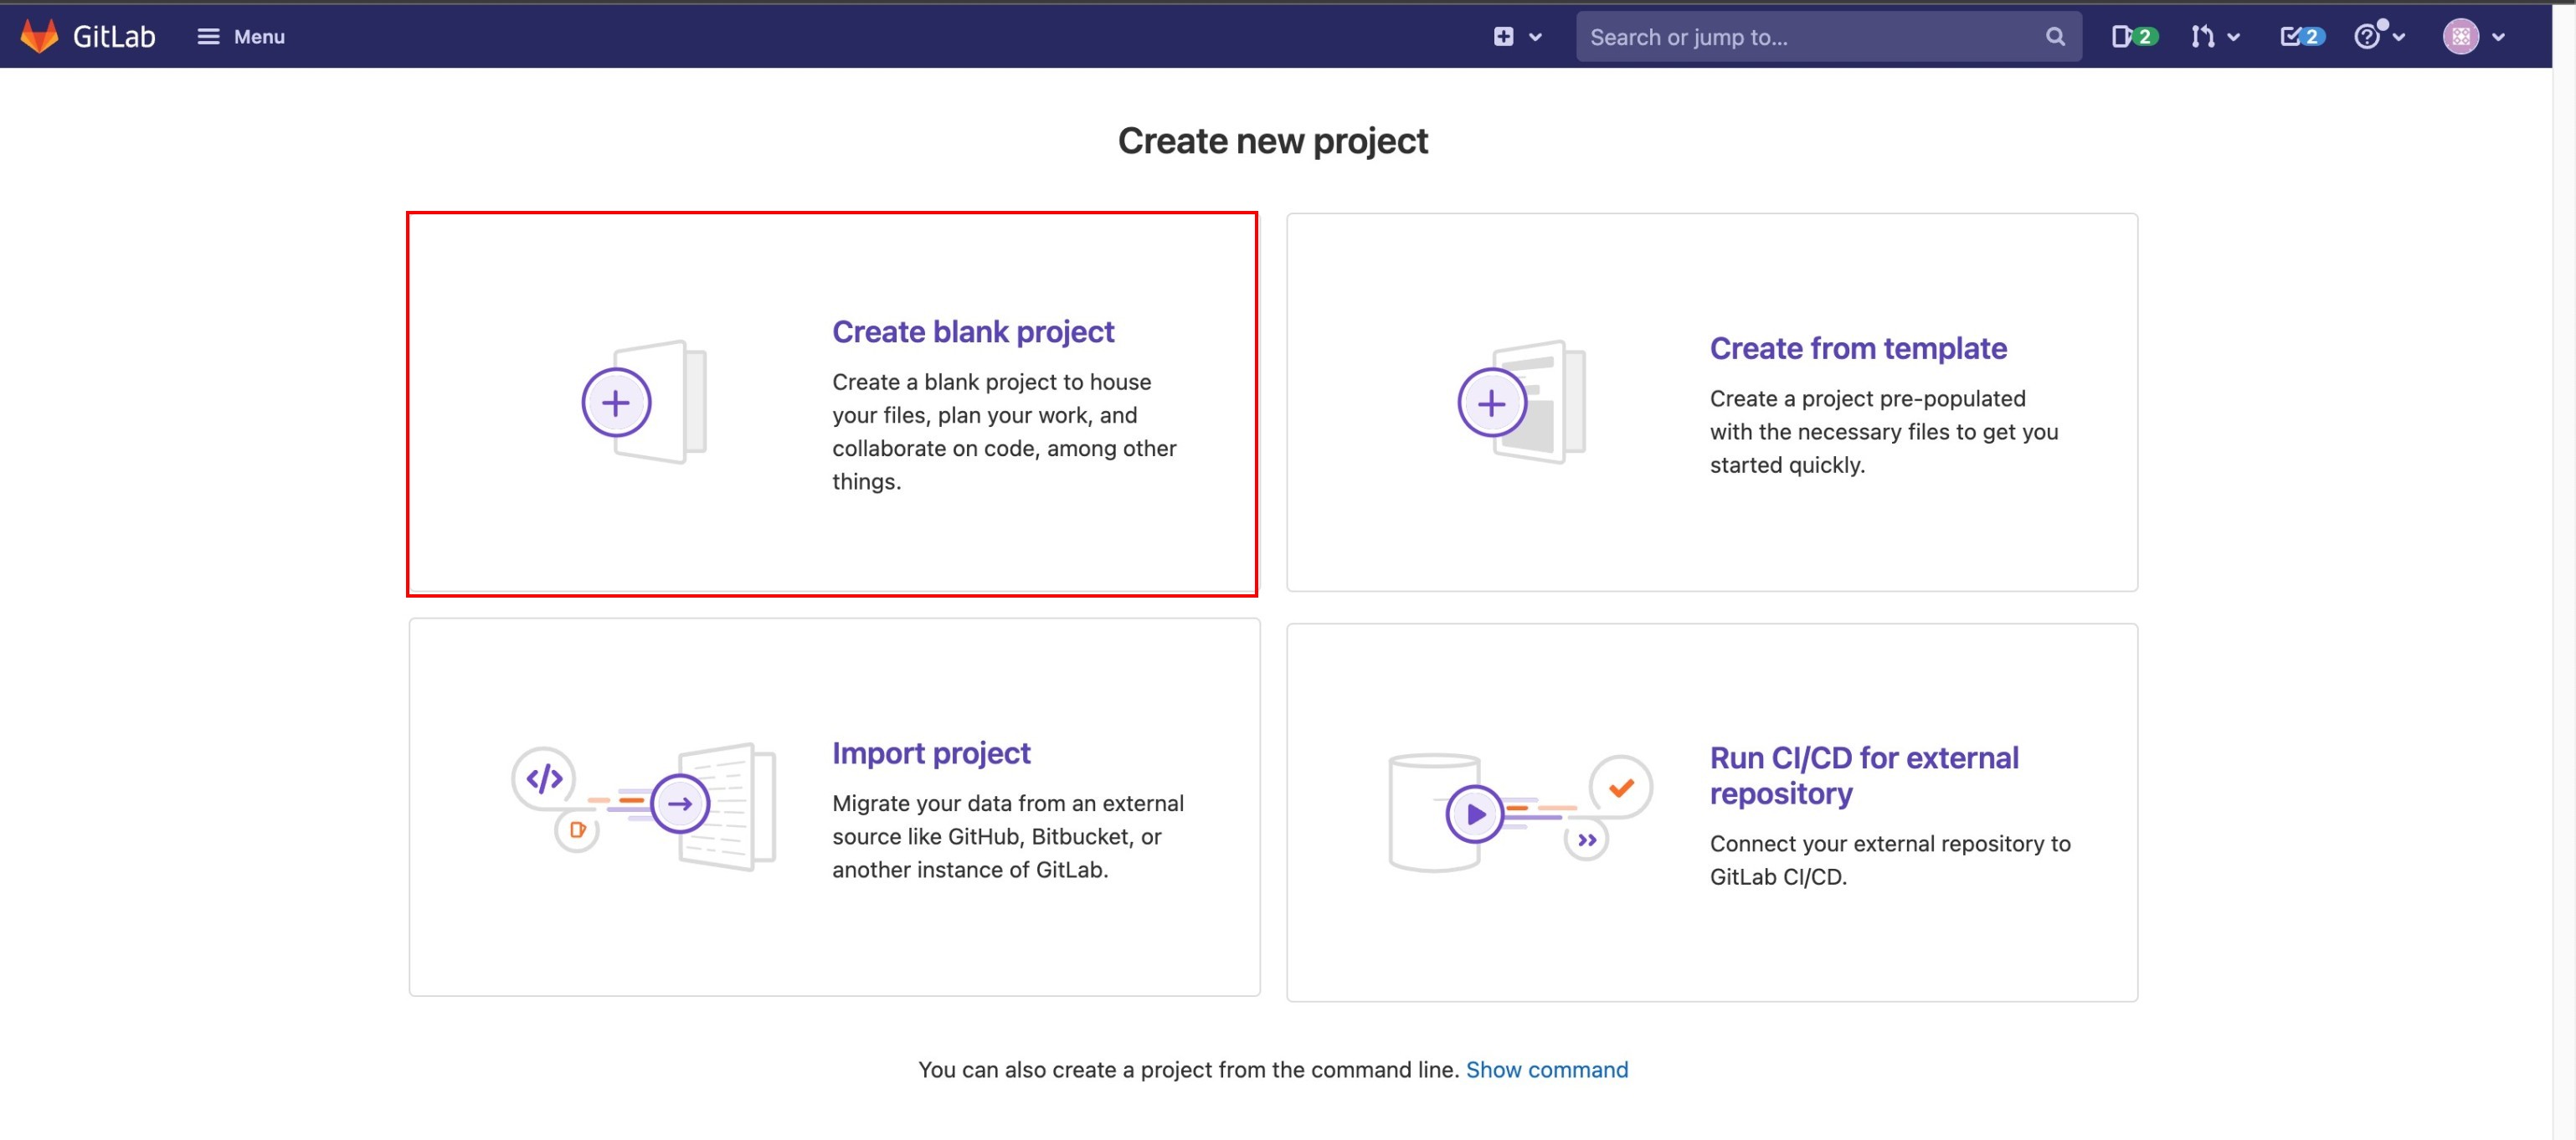
選Create blank project
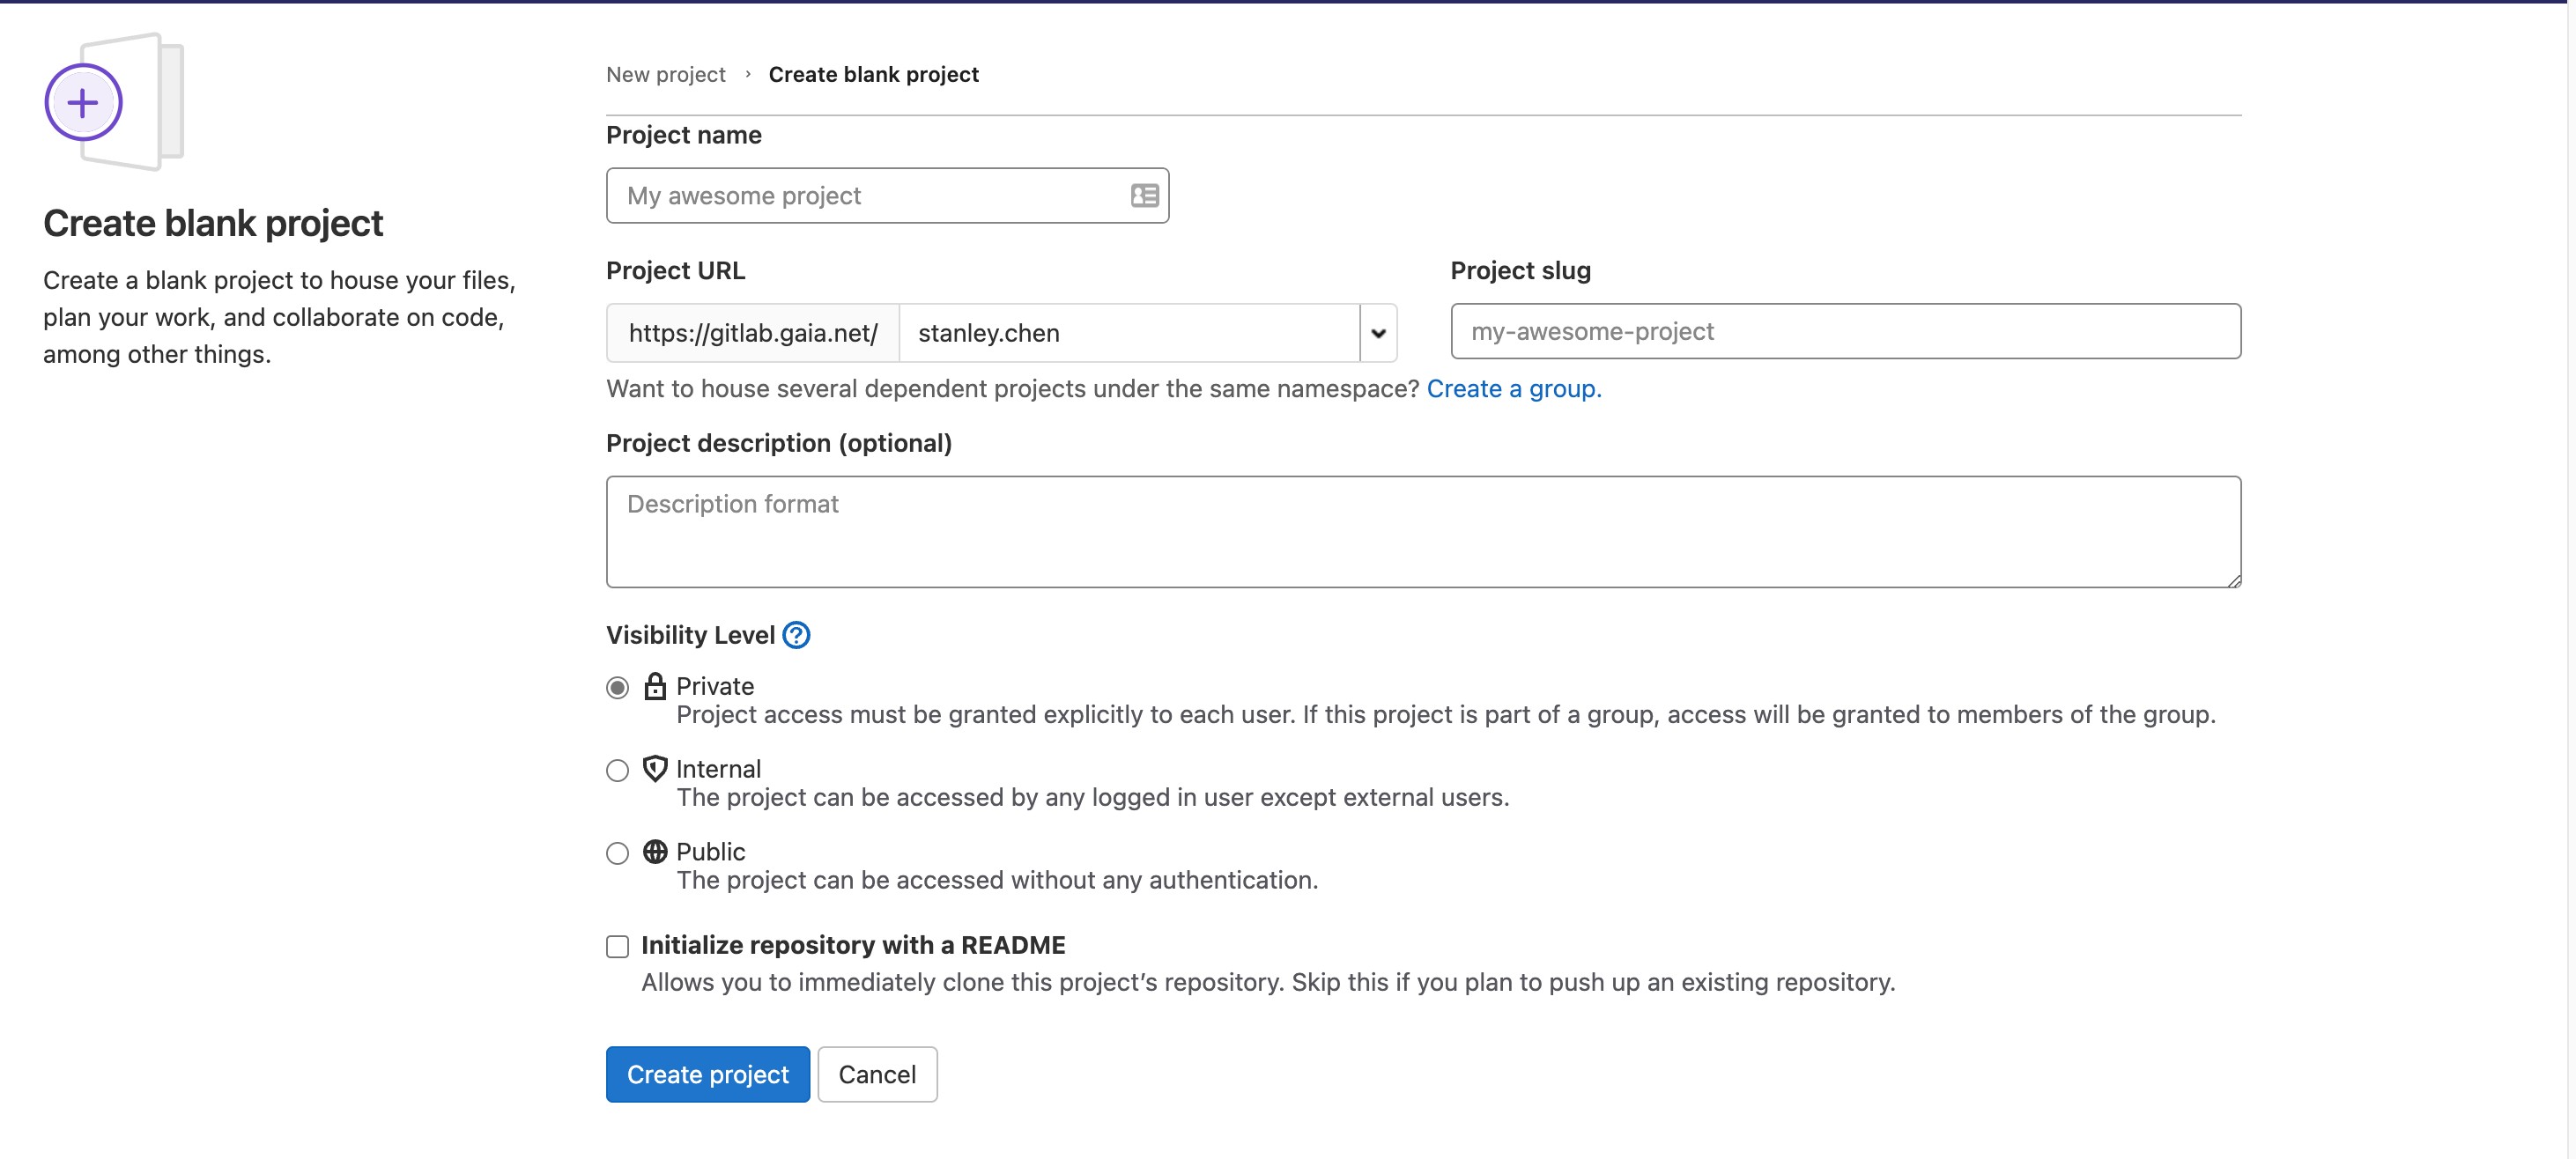
- 輸入project name
- 選擇專案隱私
- 點擊create project
- git clone 專案
~$ cd <your-workdir> ~$ git clone <your-git-link> -
編寫Dockerfile
~$ vim Dockerfile
本文透過簡單的nginx Run一個webserver
因為我們有客製自己的HTML內容所以有把檔案複製進去替換,您也可以放上您的應用程式的Dockerfile。
From nginx WORKDIR /app COPY index.html /usr/share/nginx/html/ COPY nginx.conf /etc/nginx/conf.d/default.conf EXPOSE 80
- 編輯.gitlab-ci.yml
image: docker:latest stages: - build - deploy Build: stage: build image: google/cloud-sdk before_script: - echo "$GCP_SVCACCOUNT_KEY" > gcloud-svcaccount-key.json # GCP Service-account Key - gcloud auth activate-service-account --key-file gcloud-svcaccount-key.json script: - gcloud config set project $GCP_PROJECT_ID - gcloud builds submit --tag asia.gcr.io/$GCP_PROJECT_ID/my-first-page Deploy: stage: deploy image: google/cloud-sdk before_script: - echo "$GCP_SVCACCOUNT_KEY" > gcloud-svcaccount-key.json # GCP Service-account Key - gcloud auth activate-service-account --key-file gcloud-svcaccount-key.json - gcloud config set project $GCP_PROJECT_ID script: - gcloud run deploy my-first-page --image=asia.gcr.io/$GCP_PROJECT_ID/my-first-page --platform managed --region asia-east1 --port=80 - gcloud beta run services add-iam-policy-binding --region=asia-east1 --member=allUsers --role=roles/run.invoker my-first-page #allow public access only: - master
因為避免將敏感資料寫進檔案中,我們透過參數的放是讓 gitlab-ci 去呼 GCP_SVCACCOUNT_KEY 與GCP_PROJECT_ID 接著,我們要讓gcloud 可以正常運作,存取到我們gcp上的資源,我們要產出一把json 格式的key,並將其放到gitlab參數中
- 編輯index.html
<!DOCTYPE html> <header> <title>Hello Stanley!!!</title> </header> <body bgcolor="orange"> <h1>Hello Stanley!!!!</h1> </body> </html>
- 編輯nginx.conf
... error_log /var/log/nginx/error.log; #pid /run/nginx.pid; # Load dynamic modules. See /usr/share/doc/nginx/README.dynamic. include /usr/share/nginx/modules/*.conf; #events { # worker_connections 1024; #} #http { # log_format main '$remote_addr - $remote_user [$time_local] "$request" ' # '$status $body_bytes_sent "$http_referer" ' # '"$http_user_agent" "$http_x_forwarded_for"'; # # access_log /var/log/nginx/access.log main; # # sendfile on; # tcp_nopush on; # tcp_nodelay on; # keepalive_timeout 65; # types_hash_max_size 2048; # # include /etc/nginx/mime.types; # default_type application/octet-stream; # Load modular configuration files from the /etc/nginx/conf.d directory. # See http://nginx.org/en/docs/ngx_core_module.html#include # for more information. # include /etc/nginx/conf.d/*.conf; server { listen 80; #listen [::]:80 default_server; server_name localhost; root /usr/share/nginx/html; # Load configuration files for the default server block. include /etc/nginx/default.d/*.conf; location / { root /usr/share/nginx/html; index index.html index.htm; } # location ~ \.php$ { # root /usr/share/nginx/wordpress; # fastcgi_pass 127.0.0.1:9000; # fastcgi_index index.php; # fastcgi_param SCRIPT_FILENAME $document_root$fastcgi_script_name; # include fastcgi_params; # } # location ~ /\.ht { # deny all; #` } # error_page 404 /404.html; # location = /404.html { # } # error_page 500 502 503 504 /50x.html; # location = /50x.html { # } } ...
- 產出json key,到gcp後台Service Account底下,找到
<project_id>@appspot.gserviceaccount.com,點擊進入後點選上方選單Key之後點擊Add key下拉選單create new key,選json格式
由於service account <project_id>@appspot.gserviceaccount.com 預設權限Editor目前沒有支援run.services.setIamPolicy會導致我們無法設定Public Access
- 新增 role
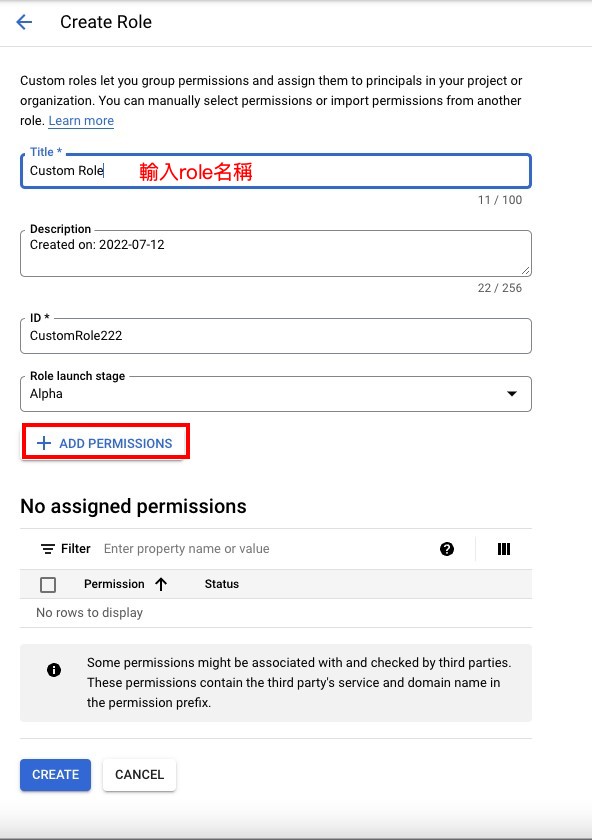
- 設定role權限

- 點擊create

-
將role設定在service account
<project_id>@appspot.gserviceaccount.com上-
進到IAM頁面,搜尋service account
<project_id>@appspot.gserviceaccount.com,點擊鉛筆編輯
-
新增剛剛建立的role

-
-
將key 放上gitlab的variable,從gitlab project進入,進入Setting選單中的CI/CD,找到variable,Add Variable,另外要再新增一筆
GCP_PROJECT_ID -
回到CLI,將剛剛編輯的檔案推送到gitlab
~$ git add . ~$ git commit -m "<your-commit>" ~$ git push
- 之後進到CI/CD選單中Pipeline觀察看看有沒有成功,成功會顯示pass

- 存取cloudrun service url
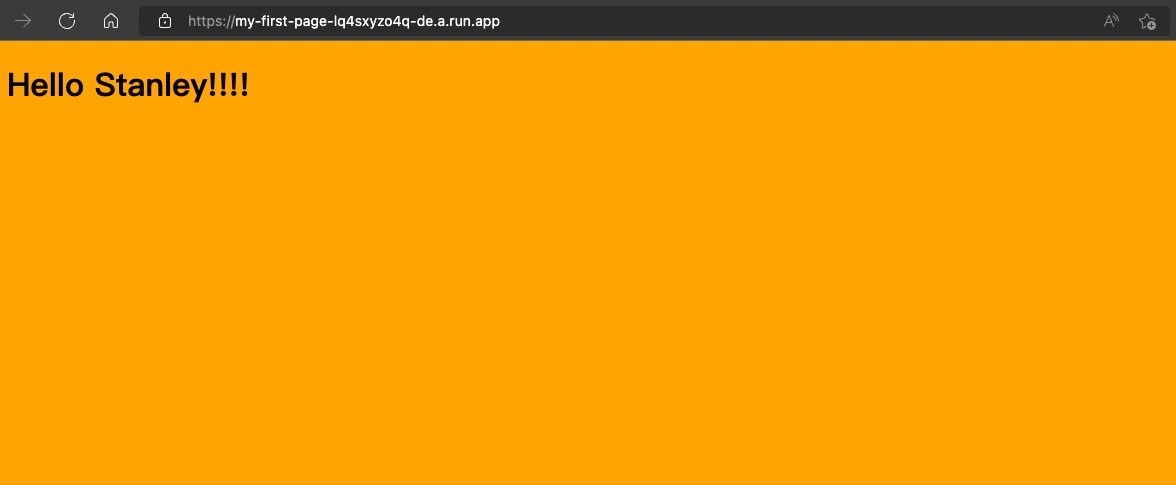
- 由
index.html我們看到目前<body bgcolor="orange">,我們將orange參數改成其他參數 ,編輯index.html
<!DOCTYPE html> <header> <title>Hello Stanley!!!</title> </header> <body bgcolor="blue"> <h1>Hello Stanley!!!!</h1> </body> </html>
- 等待CI/CD pipeline完成,刷新cloudrun service url


